
“`html
If you have a sweet tooth that dreams of the perfect combo of buttery cookie, luscious caramel, and rich chocolate, you are going to absolutely fall in love with this Twix Cookies Recipe. These delightful treats capture the iconic flavors of the beloved candy bar in a homemade cookie form that’s so satisfying and fun to make. From the crisp, tender cookie base to the gooey caramel layer and silky chocolate topping, every bite is a celebration of texture and flavor that feels like a warm hug. Whether you want to impress guests or just treat yourself, this Twix Cookies Recipe is your new go-to for an irresistible homemade sweet.
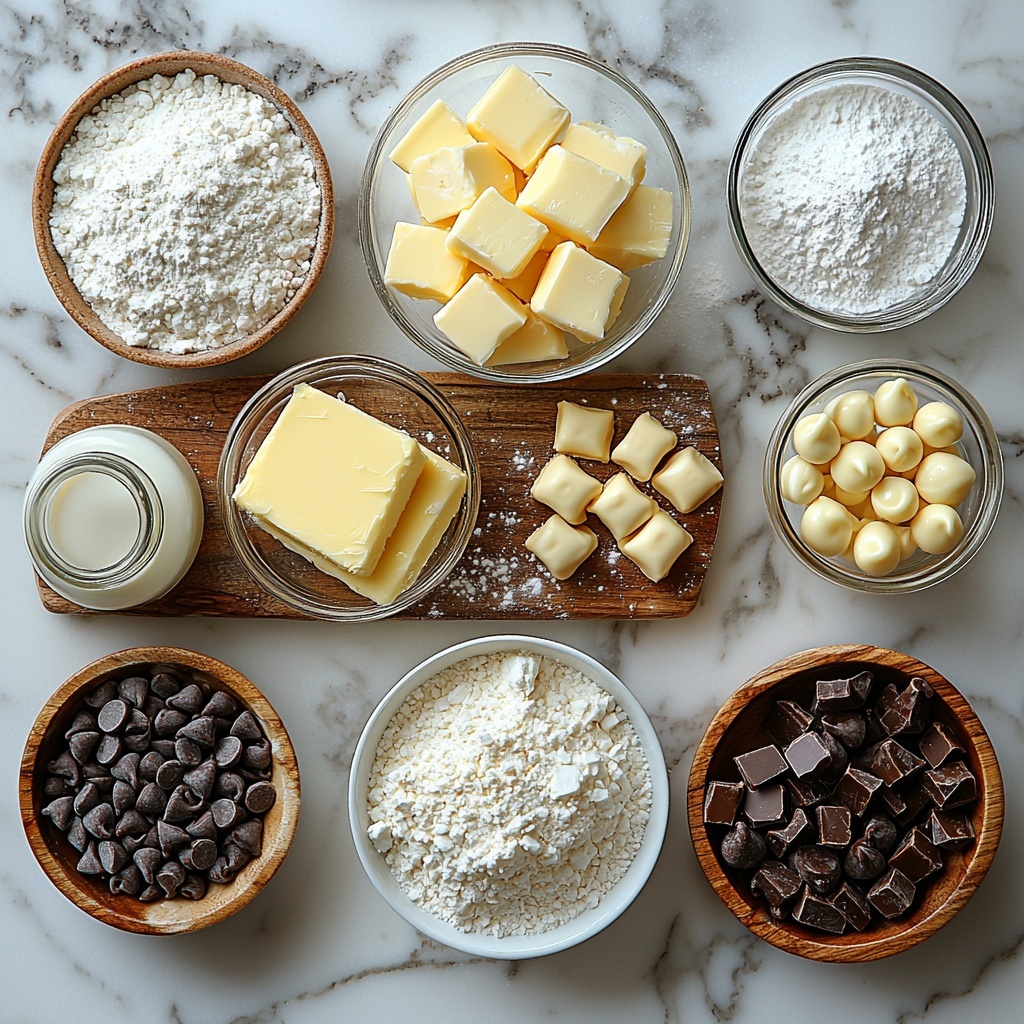
Ingredients You’ll Need
It’s amazing how just a handful of simple, everyday ingredients come together to create such a spectacular cookie. Each component plays an important role—from the buttery cookie dough that forms the perfect base, to the creamy caramel and chocolate layers that bring all the flavor magic. Here’s everything you’ll need:
- ½ cup salted butter (softened): Gives the cookie dough a rich, creamy texture and perfect buttery flavor.
- ½ cup powdered sugar: Helps create a tender, melt-in-your-mouth cookie texture.
- 1 teaspoon vanilla extract: Adds warm, sweet depth and aroma to the dough.
- ½ teaspoon baking powder: Lightens the dough so your cookies aren’t too dense or heavy.
- 1 cup all-purpose flour (plus extra for dusting): The essential structural base of your cookies that keeps everything together.
- 11 ounces Kraft caramel bits (or wrapped caramels): The heart of the Twix experience—soft, chewy caramel that’s perfectly sweet.
- 1 tablespoon whole milk: Helps melt the caramel smoothly and adds a little richness.
- ¼ teaspoon salt: Balances the sweetness and enhances all the flavors.
- 1½ cups milk chocolate chips: Creates that luscious chocolate layer that tops these cookies so beautifully.
- 1 teaspoon vegetable oil: Keeps the melted chocolate silky smooth and easy to spread.
How to Make Twix Cookies Recipe
Step 1: Prep Your Oven and Baking Sheet
Start by heating your oven to 350°F and lining a baking sheet with parchment paper. This simple step ensures your cookies bake evenly and don’t stick, saving you from any stress when it’s time to remove them.
Step 2: Cream the Butter and Sugar
Using a stand mixer fitted with a paddle attachment, beat the softened butter with the powdered sugar until it becomes pale and fluffy. This process aerates the dough, ensuring the cookies come out tender and light—this is where the magic begins!
Step 3: Combine the Vanilla, Baking Powder, and Flour
Add the vanilla extract, baking powder, and flour to your creamed butter and sugar mixture. Mix everything until just combined; this careful mixing prevents overworking the dough, which keeps your cookies soft and crumbly in all the right ways.
Step 4: Chill the Dough
Form the dough into a large disc and wrap it tightly in plastic wrap. Pop it into the fridge for about an hour. Chilling firms up the dough, which makes it much easier to roll out and cut, and helps the cookies hold their shape when baking.
Step 5: Roll and Cut the Cookies
Flour your counter and rolling pin lightly, then roll out the chilled dough to about ¼-inch thick. Use a 2½-inch round cookie cutter (floured to prevent sticking) to cut out your cookie shapes. This step is so satisfying – watching the dough transform into perfect rounds is pure joy.
Step 6: Bake to Perfection
Lay the cookies on your prepared baking sheet and bake them for 7 to 10 minutes. You want to see them set with no glossy surface, but not browned. This ensures a tender, buttery base that’s just right for holding your caramel and chocolate layers without getting too hard or crunchy.
Step 7: Cool Completely
Carefully transfer the warm cookies to a wire rack to cool completely. Patience here is key! Letting the cookies cool fully before adding toppings ensures the caramel and chocolate layers stay silky and smooth instead of melting into the cookie.
Step 8: Melt and Swirl the Caramel
In a microwave-safe bowl, combine the caramel bits with milk and microwave in one-minute bursts, stirring after each, until the mixture is smooth. Stir in the salt, then dollop a teaspoon of the caramel onto each cookie. Using the back of your spoon, swirl it around in a circle, leaving a border near the edge so the caramel stays perfectly contained. Let this set at room temperature or pop the cookies in the fridge for faster results.
Step 9: Melt and Swirl the Chocolate
Mix the milk chocolate chips and vegetable oil in a microwave-safe bowl. Heat at 30-second intervals, stirring between each, until the chocolate is smooth and glossy. Spoon one teaspoon over each caramel set, swirling it gently to cover most of the caramel and leaving a neat border. If you like, sprinkle a touch of flaky salt on top for a flavor contrast that truly elevates these cookies.
Step 10: Let the Chocolate Set
Allow the chocolate layer to firm up—either at room temperature or by refrigerating briefly. Once set, your wholesome Twix Cookies are ready for indulging!
How to Serve Twix Cookies Recipe
Garnishes
Adding a sprinkle of flaky sea salt on top right after the chocolate sets complements the sweetness beautifully and adds a gourmet touch that makes these cookies extra special. If you’re feeling adventurous, a drizzle of caramel sauce or a few crushed biscuit crumbs on top can also be lovely.
Side Dishes
These Twix cookies pair wonderfully with a chilled glass of milk, a cup of fresh-brewed coffee, or even a creamy latte. They also make a delightful dessert alongside vanilla ice cream or your favorite frozen yogurt, adding an amazing textural contrast.
Creative Ways to Present
For a party or gift, arrange your Twix Cookies Recipe on a pretty platter with colorful napkins or festive wrappers. You can also stack them and tie with a ribbon for an adorable homemade gift. Wrapping a few individually in parchment paper tied with twine turns your cookies into charming little presents everyone will adore.
Make Ahead and Storage
Storing Leftovers
Keep any leftover cookies in an airtight container at room temperature for up to 4 days. This ensures they stay fresh and maintain their delightful chewy and crisp texture combination, making them perfect for snacking anytime.
Freezing
If you want to make a batch ahead and save some for later, these cookies freeze beautifully. Place them in a single layer on a baking sheet to freeze initially, then transfer to a freezer-safe container or bag. They’ll keep well for up to 3 months. When you’re ready, simply thaw at room temperature before serving.
Reheating
To revive that freshly baked warmth, pop your Twix Cookies in a preheated 300°F oven for about 5 minutes or microwave them briefly (10-15 seconds). This makes the caramel gooey again and the chocolate just a little melty—pure bliss in every bite.
FAQs
Can I use unsalted butter instead of salted?
Absolutely! If you use unsalted butter, just add a pinch more salt to your dough to keep the flavors balanced and avoid your cookies tasting flat.
What if I don’t have caramel bits?
No worries! You can substitute with individually wrapped caramel candies—just chop them into smaller pieces so they melt more evenly during microwaving.
Can I make this recipe gluten-free?
Yes, by replacing the all-purpose flour with a gluten-free flour blend that’s suitable for baking, you can enjoy these cookies without gluten. Just be sure to use one that measures cup-for-cup like regular flour for best results.
How thick should I roll the dough?
Rolling the dough to about ¼ inch thick is ideal. This thickness strikes the perfect balance between a tender cookie that holds its shape and enough base to support the caramel and chocolate layers.
Can I store these cookies in the fridge instead of room temperature?
While you can refrigerate leftover cookies, it’s best to let them come to room temperature before enjoying as chilling can firm up the caramel and chocolate layers, making them a bit harder to bite into.
Final Thoughts
I can’t encourage you enough to dive into this Twix Cookies Recipe. It’s one of those truly satisfying homemade treats that brings together simple ingredients in an extraordinary way. Whether you’re baking for friends, family, or just to treat yourself, these cookies are sure to become a cherished favorite. So grab your apron, have fun mixing, rolling, and swirling, and enjoy every sweet moment!
“`
Print
Twix Cookies Recipe
- Prep Time: 45 minutes
- Cook Time: 15 minutes
- Total Time: 1 hour 0 minutes
- Yield: 10 cookies
- Category: Dessert
- Method: Baking
- Cuisine: American
Description
These Twix Cookies combine a buttery shortbread base with gooey caramel and rich milk chocolate, perfectly mimicking the beloved candy bar in cookie form. Crisp, sweet, and irresistibly indulgent, they’re ideal for dessert lovers craving a homemade treat with layers of flavor and texture.
Ingredients
Cookie Dough
- ½ cup salted butter (softened)
- ½ cup powdered sugar
- 1 teaspoon vanilla extract
- ½ teaspoon baking powder
- 1 cup all-purpose flour (plus extra for dusting the counter and cookie cutter)
Caramel Topping
- 11 ounces Kraft caramel bits (or 1 package of wrapped caramels)
- 1 tablespoon whole milk
- ¼ teaspoon salt
Chocolate Topping
- 1½ cups milk chocolate chips
- 1 teaspoon vegetable oil
Instructions
- Preheat Oven and Prepare Baking Sheet: Preheat your oven to 350°F (175°C) and line a baking sheet with parchment paper. Set aside to ensure a non-stick surface for baking.
- Cream Butter and Sugar: Using a stand mixer fitted with a paddle attachment, cream the softened butter and powdered sugar together until the mixture is light and fluffy, creating a smooth base for the dough.
- Add Dry Ingredients: Incorporate the vanilla extract, baking powder, and flour into the creamed mixture. Mix until well combined, forming the cookie dough.
- Chill Dough: Shape the dough into a large disc, wrap it thoroughly with plastic wrap, and refrigerate for 1 hour to firm up, making it easier to roll and cut.
- Roll and Cut Cookies: Lightly flour a clean counter and rolling pin. Roll the chilled dough out to ¼-inch thickness. Flour a 2½-inch round cookie cutter and cut out cookies from the dough.
- Bake Cookies: Place the cut-out cookies on the prepared baking sheet and bake for 7 to 10 minutes. The cookies should be set without gloss and avoid browning.
- Cool Cookies: Transfer cookies to a wire rack and allow them to cool completely before adding toppings, ensuring the caramel and chocolate won’t melt from residual heat.
- Melt Caramel: In a medium microwave-safe bowl, combine the caramel bits and whole milk. Microwave for 1 minute, then stir well. Continue heating in 20-second intervals, stirring after each, until smooth. Stir in the salt for flavor balance.
- Apply Caramel on Cookies: Spoon 1 teaspoon of the melted caramel onto each cooled cookie. Swirl in a circular motion, leaving a border around the cookie edge. Let the caramel firm up for about 30 minutes at room temperature or refrigerate for quicker setting.
- Melt Chocolate: Combine milk chocolate chips and vegetable oil in a microwave-safe bowl. Heat in 30-second intervals, stirring between each, until smooth and glossy.
- Top with Chocolate: Spoon 1 teaspoon of melted chocolate over each set caramel layer. Swirl to cover most of the caramel while leaving a border around the edge. Optional: sprinkle flaky salt on top for a gourmet finish.
- Set and Serve: Allow the chocolate topping to set at room temperature or refrigerate to speed up the process. Once set, the Twix Cookies are ready to be enjoyed!
Notes
- Use parchment paper to prevent sticking and for easier cleanup.
- Chilling the dough is essential for easy rolling and cutting.
- Do not overbake cookies to retain a tender texture.
- The caramel and chocolate layers should be allowed to fully set for best texture and handling.
- Flaky sea salt on top enhances the flavor by balancing the sweetness.
- Store cookies in an airtight container at room temperature for up to 3 days or refrigerate to extend freshness.


