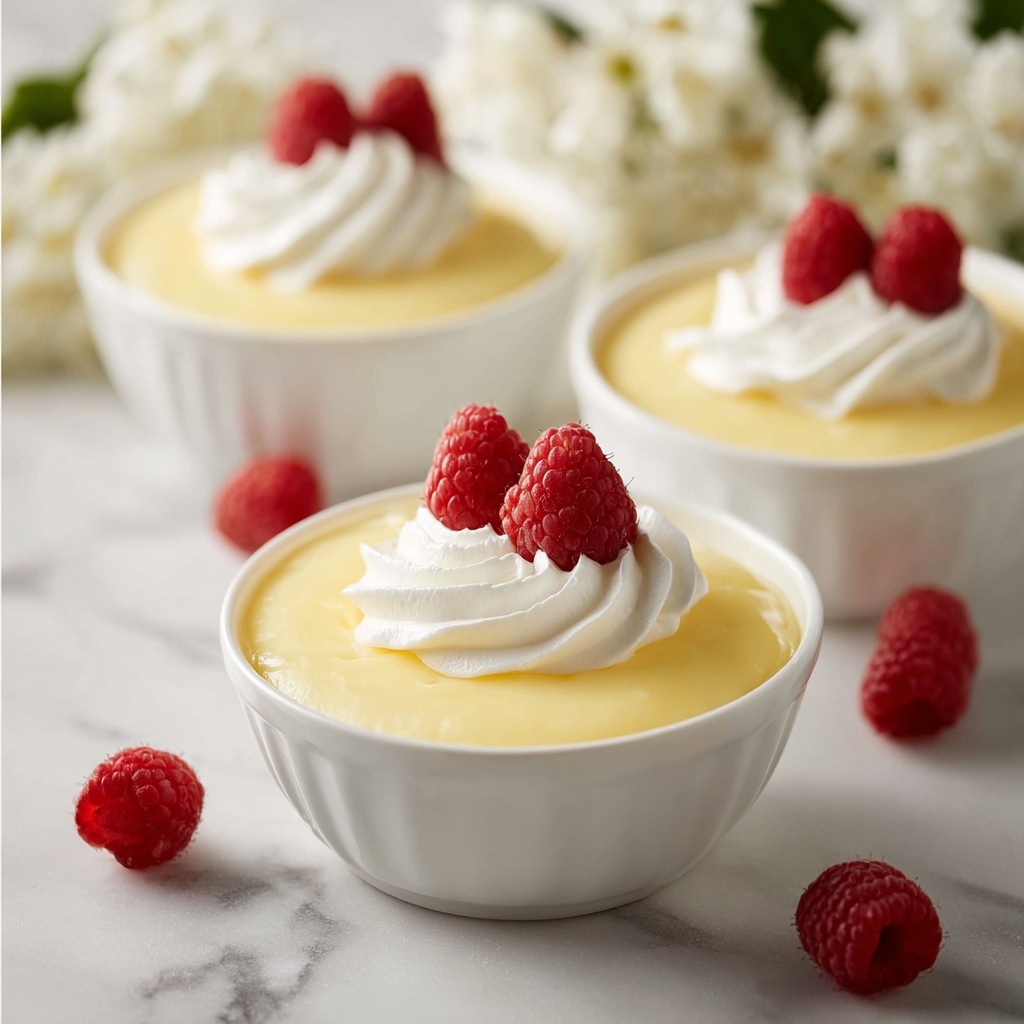
If you have a sweet tooth and love creamy desserts, you’re going to adore this Homemade Vanilla Pudding Recipe. It’s smooth, velvety, and bursting with pure vanilla flavor that feels like a warm hug in every spoonful. What’s truly wonderful about this pudding is how simple ingredients come together with just a little patience to transform into a classic treat that tastes far better than anything store-bought. Whether you enjoy it right away or chilled after a few hours, this recipe delivers a comforting dessert that feels truly special.
Ingredients You’ll Need
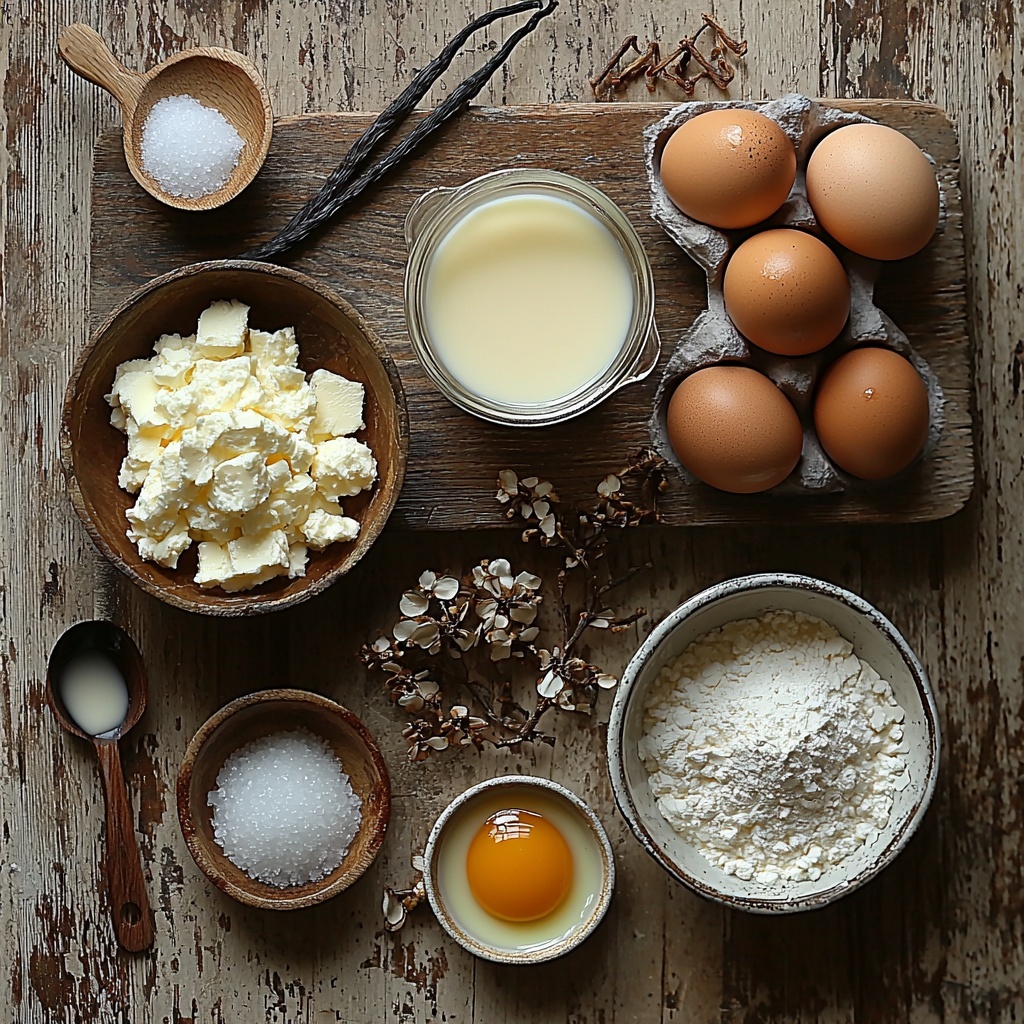
The beauty of this recipe lies in its simplicity; each ingredient plays its own crucial role in creating the perfect balance of taste, texture, and richness. From the creamy milk to the fresh egg yolks, every component enhances the pudding’s luscious consistency and irresistible flavor.
- 3 cups whole milk, divided: Whole milk gives the pudding its rich and creamy base that is essential for that smooth texture.
- 1 tablespoon butter: Adds a touch of silkiness and mouthfeel that makes each bite indulgent.
- 1 teaspoon pure vanilla extract: The star of the show, bringing depth and warmth to the pudding’s flavor.
- 3 tablespoons cornstarch: This thickens the pudding beautifully without making it gummy or heavy.
- ¾ cup sugar: Sweetens the pudding perfectly, balancing the rich dairy and egg flavors.
- Pinch of salt: Enhances the overall flavor and keeps the sweetness in check.
- 3 egg yolks: Provide body and a luxurious texture that turns this pudding into a creamy dream.
How to Make Homemade Vanilla Pudding Recipe
Step 1: Prepare the Cornstarch Slurry
Start by whisking together a quarter cup of the milk with the cornstarch until completely smooth. This slurry is the secret to avoiding any lumps in your pudding and ensures a silky texture that melts in your mouth. Setting this aside early lets you focus on the next steps without any stress.
Step 2: Warm the Milk Mixture
Next, pour the rest of the milk into a medium saucepan along with the pinch of salt and sugar. Heat over medium, stirring occasionally to dissolve the sugar. You want the mixture to get hot and steaming but not boiling—this warmth is important for activating the cornstarch later and melding the flavors beautifully.
Step 3: Temper the Egg Yolks
While the milk heats, whisk your egg yolks until smooth in a separate bowl. Then, slowly add half a cup of the hot milk mixture into the yolks while whisking briskly. This tempering step gently raises the temperature of the yolks so they won’t scramble when added back into the saucepan. Once combined, pour the yolk mixture into the milk pot, followed by the cornstarch slurry.
Step 4: Thicken the Pudding
Return the saucepan to medium heat and whisk constantly. This is where the magic happens—the mixture will start to thicken as it simmers. Keep whisking until you see the pudding coating the back of a spoon, signaling it’s perfectly thickened to that luscious, creamy consistency you’re aiming for.
Step 5: Finish with Butter and Vanilla
Remove from heat and immediately stir in the butter and pure vanilla extract. These last two ingredients boost flavor and add that final smooth richness. Give it a good stir until everything is fully combined and silky.
Step 6: Chill or Serve Warm
Pour the pudding into individual serving dishes. Place a layer of plastic wrap directly on the surface to prevent a skin from forming. You can enjoy this pudding warm or refrigerate it for several hours to serve chilled—both ways are equally delightful.
How to Serve Homemade Vanilla Pudding Recipe
Garnishes
Adding a garnish can take your homemade vanilla pudding from simple to spectacular. Try topping it with fresh berries like strawberries or raspberries for brightness and a pop of color. A sprinkle of toasted nuts adds crunch, while a dollop of whipped cream brings extra decadence. You can even dust a little cinnamon or nutmeg for a subtle spice that complements the vanilla beautifully.
Side Dishes
This pudding pairs wonderfully with light and fresh sides. Consider serving it alongside a crisp fruit salad or a small plate of shortbread cookies for some added texture. It can also complement rich desserts like chocolate cake by offering a cool, creamy contrast.
Creative Ways to Present
Presentation can be so much fun with this pudding. Serve it in clear glass cups to show off its creamy layers. You might also layer it with crumbled cookies or fruit compote to create stunning parfaits. For an elegant touch, serve in vintage teacups or small mason jars tied with a ribbon—great for parties or gifts.
Make Ahead and Storage
Storing Leftovers
Leftover pudding keeps wonderfully in the fridge for up to three days. Just make sure to keep it covered with plastic wrap or lids to prevent it from absorbing any fridge odors. Before serving again, give it a gentle stir to restore its creamy texture.
Freezing
Freezing homemade vanilla pudding is not generally recommended since the texture can change and become grainy once thawed. It’s best enjoyed fresh or chilled directly from the fridge for the ultimate creaminess.
Reheating
If you prefer your pudding warm, reheat it gently over low heat on the stove or in short bursts in the microwave, stirring frequently. Avoid overheating to prevent any curdling or separation. Adding a splash of milk while reheating can help bring back that creamy, smooth texture.
FAQs
Can I use milk other than whole milk in this pudding?
While whole milk provides the best creaminess and texture, you can use 2% or skim milk in a pinch, though the pudding may be slightly less rich. For a dairy-free alternative, try unsweetened almond or oat milk, but note the texture and flavor will vary.
Is it possible to make this pudding without eggs?
Eggs contribute to the pudding’s luxurious texture and flavor, but if you want to make an eggless version, you can increase the cornstarch slightly and use a touch of cream for richness. However, the taste and creaminess won’t be quite the same as in this classic recipe.
Why is it important to temper the egg yolks?
Tempering the egg yolks prevents them from scrambling when added to the hot milk mixture. Slowly whisking hot milk into the yolks raises their temperature gently, allowing them to incorporate smoothly and thicken the pudding without curdling.
How can I prevent a skin from forming on top of the pudding?
Placing plastic wrap directly onto the surface of the pudding while it cools stops a skin from forming. This seals the surface and keeps that lovely, smooth texture intact.
Can I add other flavors to this vanilla pudding?
Absolutely! While vanilla is classic, you can stir in citrus zest, a splash of coffee, or even a bit of melted chocolate once the pudding is done cooking. Just be sure to adjust the vanilla accordingly so the flavors balance well.
Final Thoughts
Nothing beats the comfort and joy of making your own dessert from scratch, and this Homemade Vanilla Pudding Recipe is the perfect introduction to homemade sweets that impress every time. It’s simple, heartfelt, and delicious—ideal for sharing with loved ones or indulging in a quiet moment just for you. So grab those basic ingredients and enjoy creating this timeless treat that’s sure to become a treasured favorite!
Print
Homemade Vanilla Pudding Recipe
- Prep Time: 5 minutes
- Cook Time: 15 minutes
- Total Time: 20 minutes
- Yield: 6 servings
- Category: Dessert
- Method: Stovetop
- Cuisine: American
Description
This Homemade Vanilla Pudding recipe is a classic creamy dessert made from scratch using simple ingredients like milk, sugar, egg yolks, and vanilla. The pudding is cooked gently on the stovetop to achieve a smooth, luscious texture and can be served warm or chilled. Perfect for an easy yet elegant treat, it combines the rich flavor of real vanilla with a silky mouthfeel that satisfies any sweet tooth.
Ingredients
Milk Mixture
- 3 cups whole milk, divided
- Pinch of salt
- ¾ cup sugar
Thickening and Flavoring
- 3 tablespoons cornstarch
- 3 egg yolks
- 1 tablespoon butter
- 1 teaspoon pure vanilla extract
Instructions
- Prepare Cornstarch Slurry: In a small bowl, whisk together ¼ cup of the milk with the cornstarch until smooth. This slurry will prevent lumps from forming in the pudding.
- Heat Milk Mixture: In a medium saucepan, combine the remaining 2¾ cups of whole milk with the sugar and a pinch of salt. Heat over medium heat until the milk is steaming but not boiling, stirring occasionally to dissolve the sugar evenly.
- Temper Egg Yolks: Whisk the egg yolks in a small bowl until smooth. Slowly add ½ cup of the hot milk mixture to the yolks in a thin stream while whisking constantly to temper them and prevent curdling. Gradually pour the tempered egg yolk mixture back into the saucepan, followed by the cornstarch slurry. Cook over medium heat, whisking constantly, until the pudding thickens and begins to simmer.
- Finish the Pudding: Remove the saucepan from heat. Stir in the butter and pure vanilla extract until fully incorporated and the pudding is silky smooth.
- Cool and Serve: Pour the pudding into individual serving dishes. Lay a piece of plastic wrap directly on the surface of the pudding to prevent a skin from forming. Serve warm immediately or refrigerate for several hours until chilled.
Notes
- Be sure to whisk constantly during cooking to avoid lumps and curdling.
- Using whole milk yields a richer and creamier pudding, but you can use 2% milk for a lighter version.
- Tempering the egg yolks is crucial to prevent scrambled eggs in the pudding.
- The pudding will thicken further as it cools; if too thick, stir in a little milk before serving.
- For additional flavor, try adding a cinnamon stick to the milk while heating and remove before adding the egg mixture.


