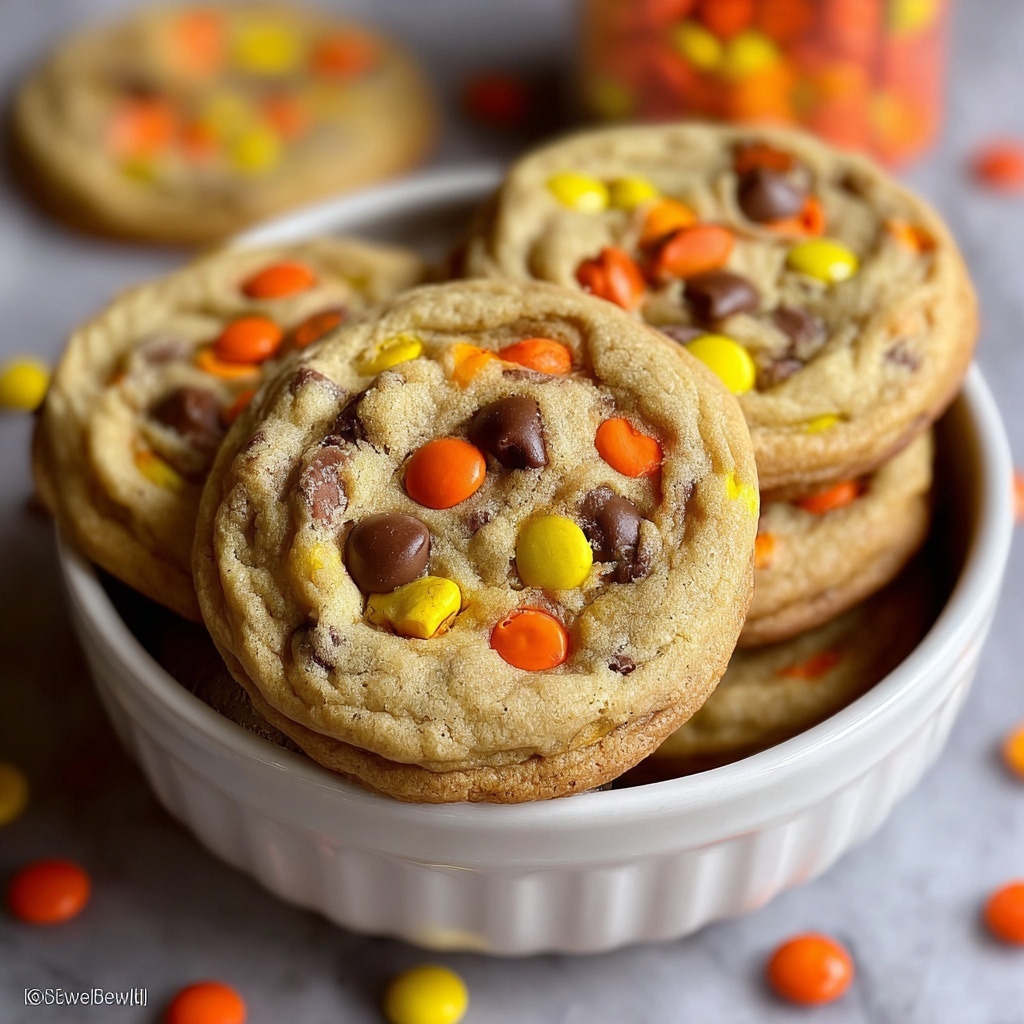
If you’re looking to wow your guests with a delightfully spooky treat, this Halloween Cauldron Cookie Creation Recipe is an absolute must-try. Imagine biting into a soft, chewy cookie shaped like a bubbling cauldron filled with mysterious, swirling potions rendered in vibrant royal icing colors. Each cookie is bursting with chocolate chips and candy corn, blending classic flavors with whimsical decoration that captures the true spirit of Halloween fun. Trust me, once you make this Halloween Cauldron Cookie Creation Recipe, it will quickly become your go-to for festive baking celebrations.
Ingredients You’ll Need
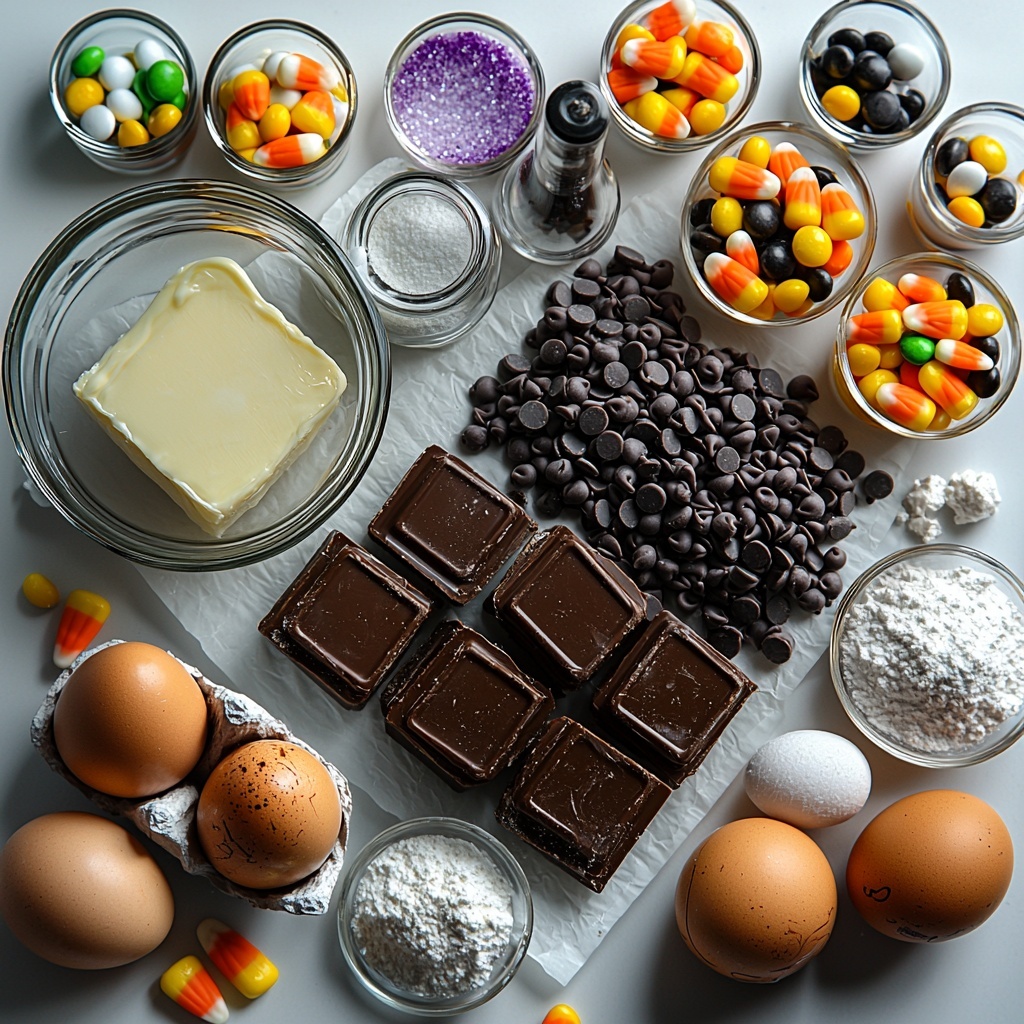
These ingredients are wonderfully straightforward yet essential for achieving the perfect balance of taste and texture. Each item plays a critical role, from the creamy butter that ensures softness, to the candy corn that adds a seasonal pop of sweetness and color.
- 1 cup unsalted butter, softened: Adds richness and a tender crumb to the cookies.
- 1 cup granulated sugar: Provides sweetness and helps create a slight crisp edge.
- 1 cup brown sugar, packed: Adds moisture and a lovely caramel undertone.
- 2 large eggs: Bind all ingredients together and contribute to cookie structure.
- 2 teaspoons vanilla extract: Enhances the overall flavor with smooth, sweet notes.
- 3 cups all-purpose flour: The base for these cookies, providing structure and chewiness.
- 1 teaspoon baking soda: Offers just the right lift so the cookies aren’t too dense.
- 1/2 teaspoon salt: Balances sweetness and deepens flavors.
- 1 cup chocolate chips: Melts into pockets of chocolatey goodness.
- 1 cup candy corn: Brings that iconic Halloween look and crunch.
- 4 cups powdered sugar, sifted: The backbone of the royal icing, for smooth, glossy decoration.
- 3 tablespoons meringue powder: Helps the icing set firm and hold its shape.
- 1/2 teaspoon clear vanilla extract: Adds flavor to the royal icing without discoloring it.
- 6-8 tablespoons warm water: Used to thin the icing to the perfect consistency.
- Green gel food coloring: For that eerie bubbling potion color in your decorations.
- Purple gel food coloring: Adds a spooky swirl of mystery.
- Black gel food coloring: Perfect for the cauldron base and outlining.
- White gel food coloring: Used to create contrast within the potion’s bubbles.
- Orange gel food coloring (optional): Adds extra vibrance and Halloween spirit to your icing palette.
- Edible glitter (optional): Sprinkles magic and shimmer over the finished potion surface.
- Various Halloween sprinkles (optional): A fun way to add texture and festive flair.
- Small candy eyes (optional): Perfect for creepy, playful finishing touches.
How to Make Halloween Cauldron Cookie Creation Recipe
Step 1: Prepare Cookie Dough
First, whisk together the dry ingredients—flour, baking soda, and salt—in a bowl. In a stand mixer, cream softened butter with granulated and brown sugar until that mixture is beautifully light and fluffy, which is key for tender cookies. Beat in eggs and vanilla, then slowly add the dry ingredients to the wet, mixing just until combined. Be sure to gently fold in the chocolate chips and candy corn last—they bring both flavor and texture that make these cookies so special. Chill your dough for at least an hour to firm it up and make rolling easier.
Step 2: Bake Cookies
Preheat your oven to 375°F (190°C). On a lightly floured surface, roll the chilled dough to about 1/4 inch thickness. If you have a cauldron-shaped cookie cutter, use it to cut out those fun shapes; otherwise, scooping the dough for drop cookies works wonderfully as well. Arrange your cookies on parchment-lined baking sheets. Bake for 8-10 minutes, just long enough for the edges to be set but the centers still soft. Once baked, transfer to wire racks and let cool completely before moving on to decorating.
Step 3: Prepare Royal Icing
In a large bowl, sift powdered sugar and meringue powder to avoid lumps. Add in clear vanilla and warm water, then beat the mixture for 5-7 minutes until it becomes thick, glossy, and forms stiff peaks—this is perfect for outlining and flooding your cookies. You’ll want to adjust consistency, making some icing thicker for piping outlines (similar to toothpaste texture) and some thinner for flooding the interior (more like honey). Divide the icing into smaller bowls and add gel food coloring: green, purple, black, white, and a splash of orange if you like. Keep the icing covered with a damp cloth to prevent drying out.
Step 4: Decorate Cauldron Base
Time to bring those cookies to life! Using black outlining icing, carefully pipe a border around each cookie to create the shape of a cauldron. This border acts like a dam to hold the flooded icing in place. Let this outline dry for about 10-15 minutes to set. Then flood the inside with black flooding icing, smoothing it evenly and popping any air bubbles gently with a toothpick. Let the black base dry completely, which could take several hours or better yet, overnight for the smoothest finish.
Step 5: Add Bubbling Potion
Once the black cauldrons are set, pipe an irregular, wavy line along the top edge of the cauldron using green outlining icing to mimic the “potion lip.” Let that dry for about 10-15 minutes. Flood this area with green flooding icing. While the green icing is still wet, drop tiny dots of purple, white, and dark green or black icing randomly inside the potion area. Using a scribe tool or toothpick, gently swirl the dots together to create a magical, bubbling effect that looks like a potion actively fizzing. Allow this layer to dry completely—plan for 6-12 hours or overnight.
Step 6: Add Final Spooky Touches
When all icing layers have dried fully, gently brush edible green or iridescent glitter over the potion for a shimmering, mystical look. Attach small candy eyes, Halloween-themed sprinkles, or edible bone decorations using tiny dots of royal icing as glue. Let any last details dry for at least an hour before serving or packaging your spooky creations.
How to Serve Halloween Cauldron Cookie Creation Recipe
Garnishes
To make these cookies stand out even more, consider topping them with extra edible glitter or a dash of Halloween sprinkles right before serving. Tiny candy eyes add a perfect creepy-cute vibe to your cauldrons. These little touches instantly make your cookies feel extra festive and fun to share.
Side Dishes
Pair your Halloween Cauldron Cookie Creation Recipe with a warm mug of hot cocoa or spiced apple cider to balance the sweetness and give a cozy, comforting complement. A platter featuring other Halloween treats like caramel popcorn, candy pumpkins, or mini pumpkin muffins makes for an irresistible seasonal dessert spread.
Creative Ways to Present
Present your cookies on a dark platter or cake stand with some dry ice fog underneath to create that authentic bubbling cauldron effect. You can also arrange them inside small cauldron-shaped bowls or wrap a few up in clear bags tied with orange and black ribbons perfect for party favors. The creative presentation sets the mood and makes serving these cookies even more memorable.
Make Ahead and Storage
Storing Leftovers
You can keep leftover cookies fresh by storing them in an airtight container at room temperature for 3-4 days. This will maintain their chewy texture and keep the royal icing decorations intact. Avoid placing them in humid areas to prevent the icing from softening.
Freezing
If you want to enjoy these cookies later, freeze them in a sealed container with parchment between layers to protect the icing. They freeze well for up to 3 months. When ready, simply thaw at room temperature inside the container to prevent condensation from damaging the decorations.
Reheating
Since these are decorated cookies, reheating isn’t necessary or recommended as it could melt the icing. They are best enjoyed at room temperature after thawing to keep their beautiful appearance and perfect texture.
FAQs
Can I use regular vanilla extract instead of clear vanilla for the icing?
While you can use regular vanilla, clear vanilla extract helps keep your royal icing bright and white, which is especially important for vibrant colors in the Halloween Cauldron Cookie Creation Recipe.
What if I don’t have a cauldron-shaped cookie cutter?
No worries! You can roll the dough and use a knife to carefully cut out cauldron shapes freehand, or simply bake drop cookies and decorate them like little bubbling pots.
How do I fix royal icing that is too thick or too thin?
If your icing is too thick, add a teaspoon of warm water at a time until you reach the desired consistency. If too thin, add small amounts of powdered sugar while mixing until it stiffens up to the right texture.
Can I substitute candy corn with other candies?
Yes! While candy corn adds a classic Halloween touch, you can use small colorful candies or mini chocolate chips to fit your preference or what you have on hand.
How long does it take for the decorated cookies to dry completely?
The black base usually needs several hours or overnight to dry completely, and the potion layer can take 6-12 hours. Patience is key to nice smooth finishes and vibrant designs in this Halloween Cauldron Cookie Creation Recipe.
Final Thoughts
I truly hope you enjoy making and sharing this Halloween Cauldron Cookie Creation Recipe as much as I do! It’s the perfect way to add a little enchanting magic to your Halloween festivities, combining fun colors, delicious flavors, and charming details. Give it a try, and watch everyone’s eyes light up when these bubbling cauldron cookies appear on your table!
Print
Halloween Cauldron Cookie Creation Recipe
- Prep Time: 1 hour 20 minutes
- Cook Time: 10 minutes
- Total Time: 15 hours 30 minutes
- Yield: 24 cookies
- Category: Dessert
- Method: Baking
- Cuisine: American
Description
Create spooky Halloween cauldron cookies with a crisp black cauldron base and vibrant bubbling potion icing. These festive cookies combine chocolate chips, candy corn, and colorful royal icing decorations for a fun and eerie treat perfect for Halloween parties and celebrations.
Ingredients
Cookie Dough
- 1 cup unsalted butter, softened
- 1 cup granulated sugar
- 1 cup brown sugar, packed
- 2 large eggs
- 2 teaspoons vanilla extract
- 3 cups all-purpose flour
- 1 teaspoon baking soda
- 1/2 teaspoon salt
- 1 cup chocolate chips
- 1 cup candy corn
Royal Icing
- 4 cups powdered sugar, sifted
- 3 tablespoons meringue powder
- 1/2 teaspoon clear vanilla extract
- 6–8 tablespoons warm water
- Green gel food coloring
- Purple gel food coloring
- Black gel food coloring
- White gel food coloring
- Orange gel food coloring (optional)
Decorations
- Edible glitter (optional)
- Various Halloween sprinkles (optional)
- Small candy eyes (optional)
Instructions
- Prepare Cookie Dough: In a bowl, whisk together 3 cups of all-purpose flour, 1 teaspoon baking soda, and 1/2 teaspoon salt. In a stand mixer, cream together 1 cup softened unsalted butter, 1 cup granulated sugar, and 1 cup packed brown sugar until light and fluffy. Beat in 2 large eggs and 2 teaspoons vanilla extract. Gradually add the dry ingredients to the wet mixture until just combined. Stir in 1 cup chocolate chips and 1 cup candy corn. Chill the dough for at least 1 hour to firm up for easier shaping.
- Bake Cookies: Preheat your oven to 375°F (190°C). On a lightly floured surface, roll the chilled dough out to 1/4 inch thickness. Cut cauldron shapes using a cookie cutter or hand-cut, or alternatively scoop dough for drop cookies. Transfer cookies to parchment-lined baking sheets. Bake for 8-10 minutes until edges are lightly set but centers remain soft. Allow cookies to cool completely on a wire rack before decorating.
- Prepare Royal Icing: Sift 4 cups powdered sugar and 3 tablespoons meringue powder together. Add 1/2 teaspoon clear vanilla extract and 6-8 tablespoons warm water. Beat the mixture with a mixer on medium-high speed until it forms thick, glossy, stiff peaks, approximately 5-7 minutes. Divide the icing into portions and color them with green, purple, black, white, and optional orange gel food colorings. Cover the icing to prevent drying out while working.
- Decorate Cauldron Base: Using black icing at a toothpaste-like consistency for outlining, pipe a border around each cooled cookie forming the cauldron shape. Allow the outlines to dry 10-15 minutes so they hold their shape. Then flood the inside area with black icing thinned to a honey-like consistency for smooth coverage. Spread evenly and use a tool or toothpick to pop any air bubbles. Let the black base dry completely for several hours or overnight to achieve a smooth surface.
- Add Bubbling Potion Effect: Once the black base is dry, pipe an irregular wavy outline along the top edge of the cauldron using green outline icing. Allow it to set for 10-15 minutes. Flood the outlined area with green flooding icing. While still wet, drop small dots of purple, white, and black/dark green icing into the green potion area. Use a scribe tool to gently drag through the dots creating a whimsical swirling bubbling potion effect. Let this potion layer dry thoroughly, 6-12 hours or overnight, to set fully.
- Add Final Spooky Touches: After all icing layers are completely dry, gently brush edible green or iridescent glitter over the potion area for a shimmering effect. Attach small candy eyes, Halloween sprinkles, or edible bones using tiny dots of royal icing as glue. Let all final decorative details dry at least 1 hour before serving or packaging your cookies for a festive Halloween treat.
Notes
- Chilling the cookie dough helps prevent spreading during baking and makes shaping easier.
- Use gel food coloring for vibrant colors without thinning royal icing consistency.
- Allow sufficient drying time between icing layers for best results and to avoid bleeding.
- Scribe tools can be substituted with toothpicks or a fine needle for creating designs in flooding icing.
- Store decorated cookies in an airtight container at room temperature for up to 5 days.
- Optional decorations like edible glitter and candy eyes add fun Halloween flair.
