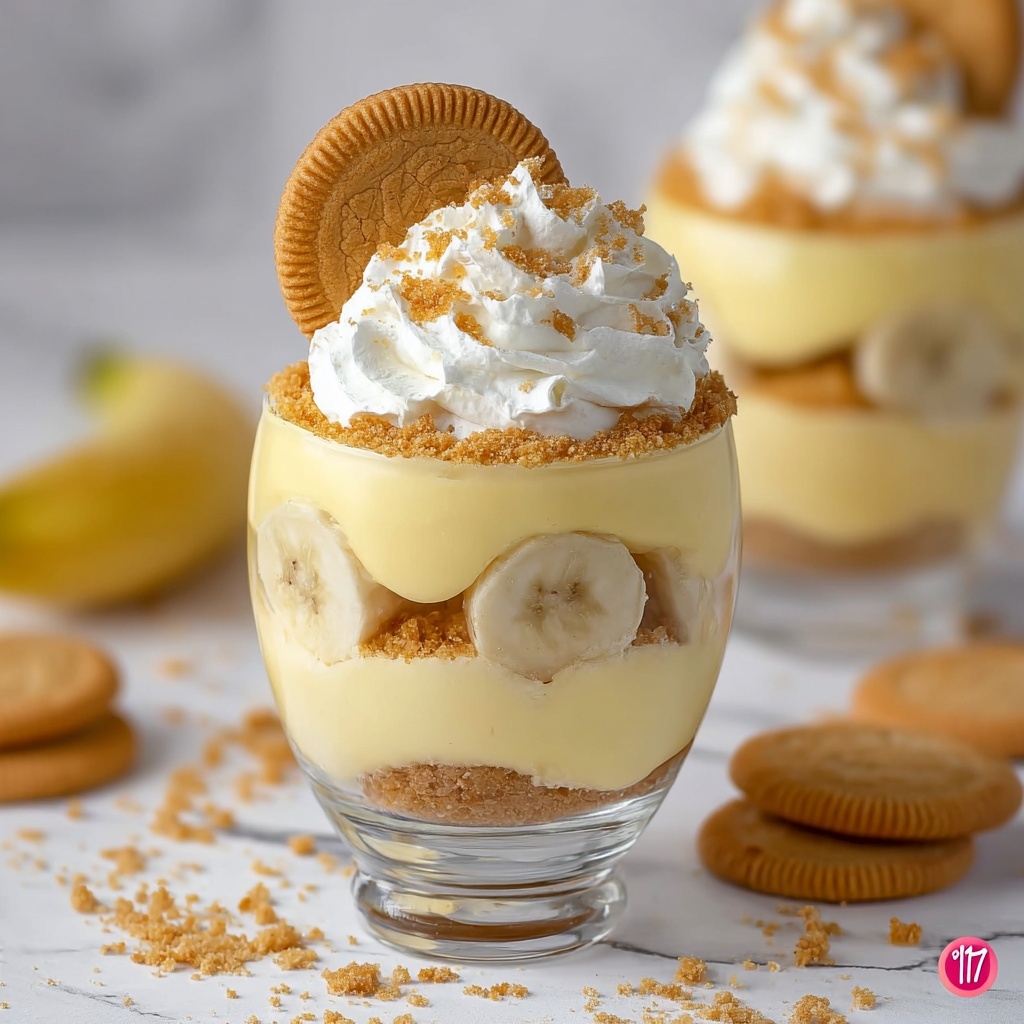
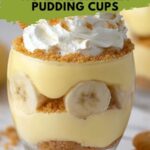
There is something truly comforting and delightful about sinking your spoon into a creamy, dreamy dessert that comes together with zero baking fuss. That’s exactly what makes the No-Bake Banana Pudding Cups Recipe one of my absolute favorites to whip up whenever I want a quick yet irresistibly luscious treat. Layers of velvety vanilla pudding, fresh ripe bananas, and crisp vanilla wafers unite into little cups of bliss that are perfect for any occasion, from casual family nights to impressing guests without breaking a sweat. Trust me, once you try these, they’ll become your go-to dessert for good reason.
Ingredients You’ll Need
This No-Bake Banana Pudding Cups Recipe keeps things wonderfully simple but packs loads of flavor. Each ingredient plays a special role in creating the perfect balance of creamy texture, natural sweetness, and just the right crunch to elevate your dessert game.
- 2 cups whole milk: Provides a rich base for the pudding that’s smooth and satisfying.
- 1 package (3.4 oz) instant vanilla pudding mix: The quick and easy way to get a luscious vanilla flavor without any baking.
- 1 cup heavy whipping cream: Adds lightness and fluffiness when whipped, balancing the pudding’s creaminess.
- 1/4 cup powdered sugar: Sweetens the whipped cream gently without graininess.
- 1 teaspoon vanilla extract: Enhances the overall vanilla notes—pure magic in every bite.
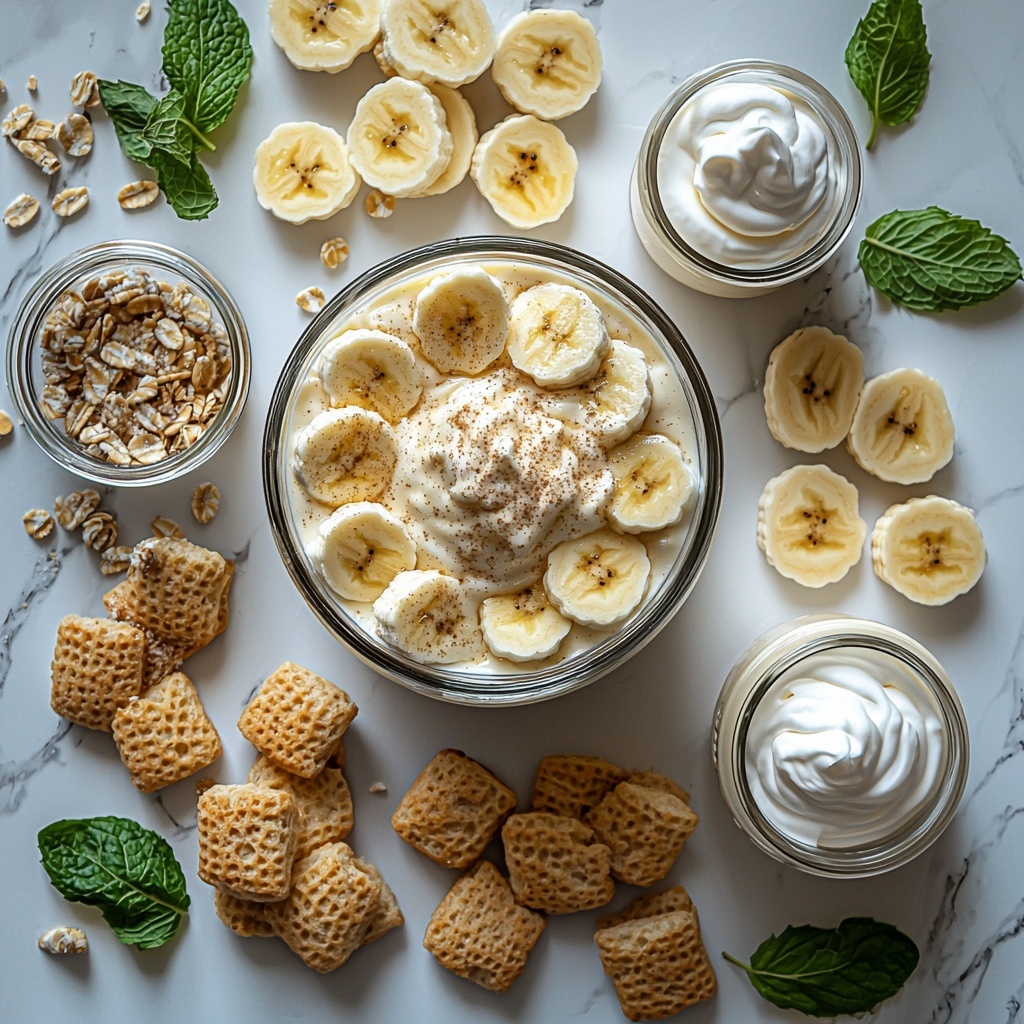
- 3-4 ripe bananas (sliced): Fresh banana slices bring that fruity sweetness and a soft, melt-in-your-mouth texture.
- 1 package (12 oz) vanilla wafers or graham crackers: Adds a delightful crunch and subtle vanilla or honey flavor.
- Whipped cream (for topping): For that extra indulgent and creamy finish on top.
- Fresh mint leaves (for garnish, optional): A pop of green and a refreshing aroma that brightens the presentation.
How to Make No-Bake Banana Pudding Cups Recipe
Step 1: Prepare the Pudding
Start by whisking together the whole milk and instant vanilla pudding mix in a medium bowl until smooth. This is the foundation for your dessert’s creamy texture. Let it rest for about five minutes so it thickens nicely. Meanwhile, whip the heavy cream with powdered sugar and vanilla extract until soft peaks form—this whipped cream is what will give your pudding that cloud-like lightness. Carefully fold the whipped cream into the thickened pudding until fully combined, creating a luscious, airy mixture that will make every spoonful simply heavenly.
Step 2: Assemble the Cups
Grab your favorite serving cups or bowls and get ready to layer. Start with a crunchy bed of vanilla wafers or graham crackers—it’s the perfect base that contrasts beautifully with the creamy pudding. Spoon a generous layer of the prepared pudding over the cookies, then arrange a layer of freshly sliced bananas on top. Repeat these layers until your cups are full, making sure to finish with a final layer of pudding for that smooth finish that sets this dessert apart.
Step 3: Chill and Serve
Cover your assembled cups with plastic wrap and place them in the refrigerator for at least two hours. This chilling time allows the flavors to blend harmoniously and the layers to meld into one perfectly balanced treat. When you’re ready to serve, crown each cup with a swirl of whipped cream and, if you like, garnish with fresh mint leaves to add a delightful hint of freshness and a pop of color.
How to Serve No-Bake Banana Pudding Cups Recipe
Garnishes
While these pudding cups look stunning on their own, a few carefully chosen garnishes can take them from delicious to dazzling. A dollop of whipped cream gives that classic creamy topping everyone loves. Scatter some finely crushed vanilla wafers or even a sprinkle of cinnamon to add subtle texture and warmth. And if you’re feeling a little fancy, fresh mint leaves or a drizzle of caramel sauce really elevate the look and flavor.
Side Dishes
This dessert pairs wonderfully with simple, fresh sides that don’t overwhelm its gentle sweetness. A light, crisp salad with citrusy dressing makes a refreshing contrast at the end of a meal. If you’re serving for brunch, some buttery toast or freshly brewed coffee complement the pudding cups superbly. Think of these cups as the cozy final embrace after a delightful dinner journey.
Creative Ways to Present
Don’t feel limited to traditional serving bowls—try these pudding cups in mason jars for a rustic charm or clear glasses to show off all the beautiful layers. For a casual party, layering them in a large trifle dish makes a stunning centerpiece that guests can help themselves from. You can even add some fun by alternating vanilla wafers with gluten-free cookies or switching up bananas with other fruits like strawberries or peaches to introduce new tastes and colors.
Make Ahead and Storage
Storing Leftovers
Leftover No-Bake Banana Pudding Cups Recipe can be stored covered in the refrigerator for up to 2 days. Keep in mind that the bananas may start to brown and the cookies soften over time, so they’re best enjoyed fresh or within a short timeframe to maintain their texture and flavor.
Freezing
Freezing isn’t recommended for this dessert because the pudding and bananas don’t hold up well to thawing; they tend to become watery or mushy. To enjoy the best texture and flavor, it’s better to prepare only what you’ll eat within a couple of days.
Reheating
Since this is a chilled dessert, reheating is not necessary and would actually compromise the creamy texture and fresh fruit layers. Keep it cool and refreshing by serving straight from the refrigerator.
FAQs
Can I make this recipe dairy-free?
Absolutely! Swap the whole milk for almond or oat milk and use dairy-free whipping cream alternatives. Just make sure your pudding mix is vegan or dairy-free for a fully dairy-free No-Bake Banana Pudding Cups Recipe.
How ripe should the bananas be?
Choose bananas that are ripe but not overly so. They should be sweet with a few brown spots but still firm enough to hold their shape in layers without turning mushy or overly sweet.
Can I use a different cookie instead of vanilla wafers?
Definitely! Graham crackers are a classic substitute that adds a nice honeyed crunch. Gluten-free cookies or even crushed shortbread can work beautifully depending on your preference and dietary needs.
Is it possible to add extra layers or ingredients?
Yes! Adding layers such as sliced strawberries, toasted coconut, or even a drizzle of chocolate syrup can give your pudding cups a creative spin. Just be mindful of balancing flavors so the bananas and vanilla pudding remain the stars.
How long do these cups need to chill?
For best results, chilling for at least two hours is recommended. This allows the pudding to set properly and the flavors to harmonize, making each spoonful melt-in-your-mouth perfect.
Final Thoughts
If you’re searching for a dessert that feels like a warm hug but doesn’t demand hours in the kitchen, the No-Bake Banana Pudding Cups Recipe is exactly what you need. It’s an effortless way to bring joy to your table, combining creamy goodness, fresh fruit, and a satisfying crunch into one delightful package. So go ahead, gather your ingredients, and treat yourself and your loved ones to a little cup of happiness—you won’t regret it!
Print
No-Bake Banana Pudding Cups Recipe
- Prep Time: 20 minutes
- Cook Time: 0 minutes
- Total Time: 2 hours 20 minutes
- Yield: 6 servings
- Category: Dessert
- Method: No-Cook
- Cuisine: American
Description
These no-bake banana pudding cups are a creamy, sweet, and easy-to-make dessert perfect for any occasion. Layers of smooth vanilla pudding, ripe bananas, and crisp vanilla wafers or graham crackers come together beautifully, topped with whipped cream and a fresh mint garnish. With minimal prep and chilling time, this indulgent treat is simple yet impressive.
Ingredients
For the Pudding:
- 2 cups whole milk
- 1 package (3.4 oz) instant vanilla pudding mix
- 1 cup heavy whipping cream
- 1/4 cup powdered sugar
- 1 teaspoon vanilla extract
For the Assembly:
- 3–4 ripe bananas, sliced
- 1 package (12 oz) vanilla wafers or graham crackers
- Whipped cream (for topping)
- Fresh mint leaves (for garnish, optional)
Instructions
- Prepare the Pudding: In a medium bowl, whisk together the whole milk and instant vanilla pudding mix until smooth. Allow the mixture to sit for about 5 minutes so it thickens properly. Meanwhile, in a separate bowl, whip the heavy cream with powdered sugar and vanilla extract until soft peaks form. Gently fold the whipped cream into the pudding mixture until fully combined and smooth.
- Assemble the Cups: In serving cups or bowls, place a layer of vanilla wafers or graham crackers at the bottom. Spoon a layer of the prepared pudding over the cookies, followed by a layer of sliced bananas. Repeat these layers until the cups are nearly full, finishing with a final layer of pudding on top.
- Chill and Serve: Cover the assembled cups with plastic wrap and refrigerate for at least 2 hours to allow the flavors to meld and the pudding to set fully. Just before serving, top each cup with a dollop of whipped cream and garnish with fresh mint leaves if desired.
Notes
- For a dairy-free version, substitute almond or oat milk for the whole milk and use dairy-free whipped cream.
- Use banana-flavored instant pudding mix if you prefer a stronger banana flavor.
- Gluten-free cookies can be used instead of vanilla wafers or graham crackers for dietary restrictions.
- Make sure to slice the bananas just before assembling to prevent browning.
- Chilling time is important to allow the pudding to set and the flavors to combine, so do not skip refrigeration.

