
If you’re ready to elevate your meals with a luscious, flavorful sauce, then you’re in for a treat. The Garlic Aioli: Discover the Secret to Creamy Perfection! Recipe is the ultimate companion to everything from crispy fries to grilled veggies. This aioli boasts a gorgeous, rich creaminess balanced with the bright zing of lemon and that unmistakable garlicky punch, making it an irresistible addition to your culinary repertoire. Once you master this recipe, you’ll wonder how you ever lived without it!
Ingredients You’ll Need
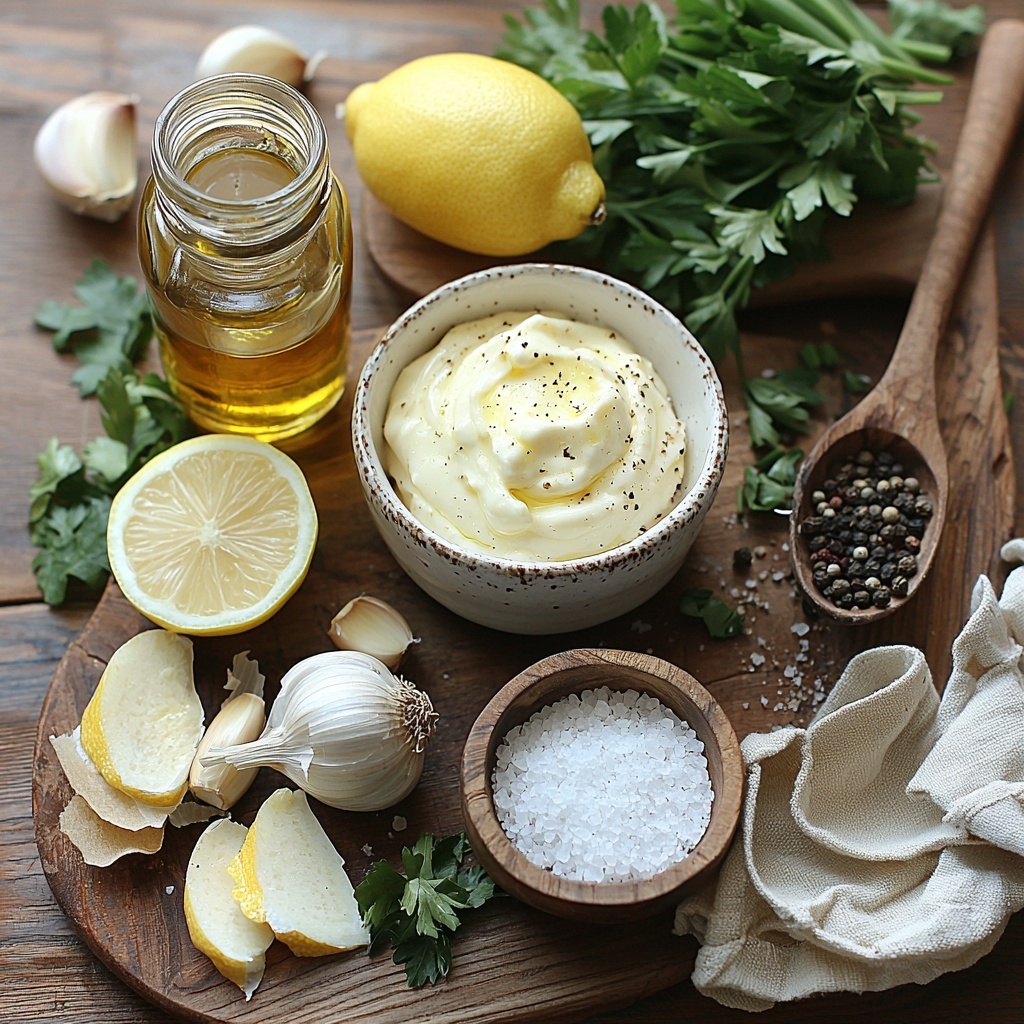
Getting this Garlic Aioli just right is all about simple, quality ingredients that play perfectly together. Each component is essential for achieving that silky texture, vibrant flavor, and fresh aroma that make this sauce so dreamy.
- Mayonnaise: Choose homemade if you have time—it adds an unbeatable freshness and creaminess.
- Fresh Garlic: Mincing 2-3 cloves releases the sharp, aromatic essence that defines aioli.
- Lemon Juice: A bright splash of acidity that lifts and balances the rich garlic and mayo.
- Olive Oil: Extra virgin is best here, bringing fruity undertones and silkiness as you whisk it in.
- Salt: Enhances every other flavor, so season thoughtfully to taste.
- Black Pepper: Freshly ground packs a peppery warmth that complements garlic beautifully.
- Fresh Herbs (optional): Parsley or chives add a lovely herbal freshness and splash of color.
How to Make Garlic Aioli: Discover the Secret to Creamy Perfection! Recipe
Step 1: Prepare Your Garlic
The magic begins by peeling and mincing your fresh garlic cloves. The finer the mince, the more seamlessly the garlic will meld into the aioli, infusing every creamy bite with vibrant flavor without any overwhelming chunks.
Step 2: Combine Base Ingredients
In a small bowl, mix your mayonnaise with that beautifully minced garlic, freshly squeezed lemon juice, and a pinch of salt and pepper. This creates the foundation of your aioli, where tang and creaminess start to mingle wonderfully.
Step 3: Emulsify with Olive Oil
Now for the secret to creamy perfection: slowly drizzle the extra virgin olive oil into your mixture while whisking vigorously. This gradual incorporation lets the oil and mayo bind together into a luxurious, smooth emulsion that’s utterly indulgent.
Step 4: Taste and Adjust
Once emulsified, it’s time to taste! Adjust the seasoning with more salt, pepper, or lemon juice depending on your preference. This step is crucial to personalize your aioli and bring out the perfect balance of flavors.
Step 5: Add Fresh Herbs (Optional)
If you want to add a fresh twist, fold in finely chopped herbs like parsley or chives. They not only brighten the flavor but also give a lovely fleck of green color that makes the aioli visually inviting.
Step 6: Chill Before Serving
Transfer your newly created garlic aioli into an airtight container and pop it in the refrigerator for at least 30 minutes. This chilling step lets the flavors meld and intensify, ensuring every spoonful is packed with creamy garlic goodness.
How to Serve Garlic Aioli: Discover the Secret to Creamy Perfection! Recipe
Garnishes
Garlic aioli is a star in its own right but topping it with a sprinkle of smoked paprika, a drizzle of olive oil, or a pinch of fresh herbs can elevate its presentation and add extra flavor layers. These small touches make the dip feel special and restaurant-quality.
Side Dishes
This sauce shines alongside crispy golden fries, roasted potatoes, grilled seafood, or fresh vegetable crudités. Its creamy tangy bite pairs beautifully with both rich and light dishes, making it a versatile companion at your table.
Creative Ways to Present
Think beyond a simple dip—use this garlic aioli as a spread on sandwiches and burgers or a drizzle over grilled meats and veggies for instant gourmet flair. You can also whip it into salad dressings or even gently fold it into potato salad for a luxurious texture boost.
Make Ahead and Storage
Storing Leftovers
Any leftover garlic aioli should be stored in an airtight container in the refrigerator. It stays fresh for up to a week, making it perfect for quick snacks or easy meal enhancers throughout the week.
Freezing
Although this aioli is best enjoyed fresh for maximum creaminess, you can freeze it in a sealed container for up to one month. Just be aware that the texture might change slightly once thawed, so give it a good stir before serving.
Reheating
Reheating aioli is not recommended as it’s enjoyed best cold or at room temperature. Instead, allow frozen aioli to thaw gently in the fridge and serve chilled for delightful flavor and texture.
FAQs
Can I use garlic powder instead of fresh garlic?
While garlic powder can provide some flavor, fresh garlic is essential in this recipe to achieve that robust, aromatic punch. Freshly minced garlic truly unlocks the depth that makes this aioli so special.
Is it possible to make this recipe vegan?
Absolutely! Substitute mayonnaise with a vegan mayo alternative, and make sure your olive oil and lemon juice are fresh. The rest of the process stays the same, creating a delicious vegan-friendly garlic aioli.
How long should I chill the aioli before serving?
At least 30 minutes in the refrigerator allows the flavors to blend perfectly and the texture to firm up to that luscious consistency you’re aiming for.
Can I add other flavors to this aioli?
Definitely! Feel free to experiment by adding a pinch of smoked paprika, a dash of cayenne for heat, or even a teaspoon of Dijon mustard to give your aioli a unique twist.
What dishes go best with garlic aioli?
This aioli pairs beautifully with so many dishes—think crispy fries, roasted vegetables, grilled chicken or fish, sandwiches, and even as a salad dressing component. It’s incredibly versatile and elevates simple meals effortlessly.
Final Thoughts
There’s something truly magical about mastering the Garlic Aioli: Discover the Secret to Creamy Perfection! Recipe. Beyond its delicious taste, creating this sauce from scratch is deeply rewarding and opens up a world of culinary possibilities. I can’t wait for you to try it and discover how this creamy, garlicky delight can transform your everyday dishes into something genuinely extraordinary.
Print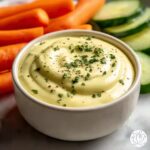
Country Fried Steak with Creamy Gravy Recipe
- Prep Time: 10 minutes
- Cook Time: 0 minutes
- Total Time: 40 minutes (including chilling time)
- Yield: 1 cup (serves approximately 4-6 as a condiment)
- Category: Sauce/Condiment
- Method: No-Cook
- Cuisine: Mediterranean
- Diet: Halal
Description
This Garlic Aioli recipe reveals the secret to achieving a creamy, flavorful sauce perfect for dipping, spreading, or adding a garlicky punch to your favorite dishes. Made with fresh garlic, tangy lemon juice, and rich olive oil emulsified into mayonnaise, this homemade aioli is easy to prepare and customizable with fresh herbs.
Ingredients
Primary Ingredients
- 1 cup Mayonnaise – Opt for homemade for extra freshness.
- 2–3 cloves Fresh Garlic – Peeled and minced.
- 1–2 tablespoons Lemon Juice – Adjust to taste.
- 1/4 cup Olive Oil – Extra virgin preferred for flavor.
- Salt – To taste.
- Black Pepper – Freshly ground, to taste.
Optional Additions
- Fresh Herbs – Such as parsley or chives, finely chopped.
Instructions
- Prepare Garlic: Peel 2-3 fresh garlic cloves and finely mince them using a sharp knife or garlic press to release their intense flavor.
- Combine Base Ingredients: In a small mixing bowl, mix 1 cup of mayonnaise with the minced garlic, 1-2 tablespoons of fresh lemon juice, and a pinch of salt and black pepper to begin building your aioli’s base flavor.
- Emulsify Oil: While whisking continuously, slowly drizzle in 1/4 cup of extra virgin olive oil to emulsify the mixture, creating a creamy and smooth texture.
- Adjust Seasoning: Taste the garlic aioli and add more salt, pepper, or lemon juice as needed to balance the flavors perfectly.
- Add Herbs (Optional): If desired, gently fold in finely chopped fresh herbs like parsley or chives to add an herbal note and fresh vibrance to the sauce.
- Chill: Transfer the aioli to an airtight container and refrigerate for at least 30 minutes to allow the flavors to meld before serving.
Notes
- This aioli can be stored in the refrigerator for up to 3 days.
- Use fresh garlic for the best flavor; roasting garlic will give a milder, sweeter taste if preferred.
- Adjust the lemon juice and seasoning to suit your taste preferences.
- Perfect as a dip for fries, a spread for sandwiches, or a sauce for grilled meats and vegetables.


