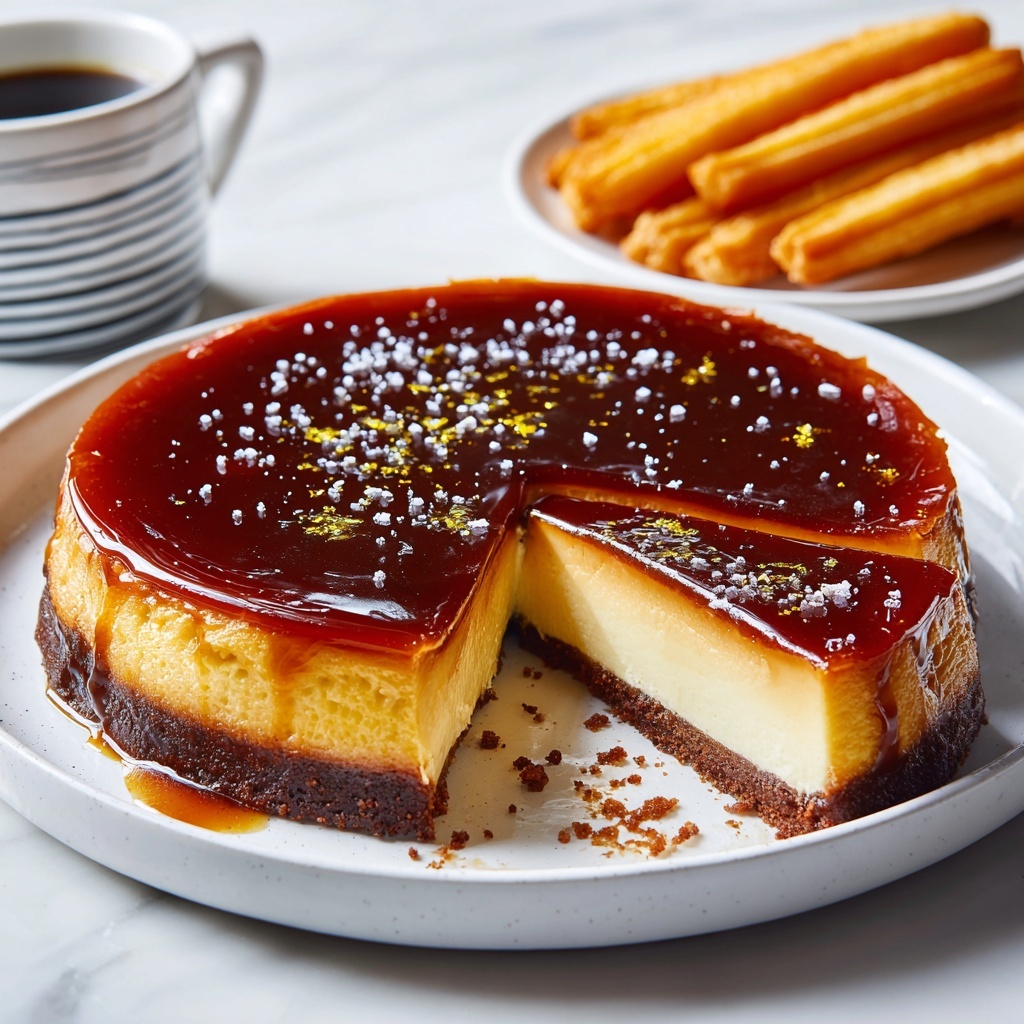
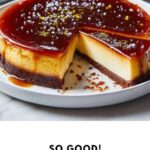
If you have a sweet tooth and love that perfect balance of creamy, rich cheesecake with the buttery, slightly salty punch of caramel, then you’re in for a treat with the Salted Caramel Cheesecake: An Incredible Ultimate Recipe. This dessert combines a buttery graham cracker crust, a smooth and velvety cream cheese filling, and a luscious homemade salted caramel sauce that blankets the cheesecake in a golden, decadent finish. Trust me, every bite will feel like a celebration of flavors and textures that you won’t want to miss making again and again.
Ingredients You’ll Need
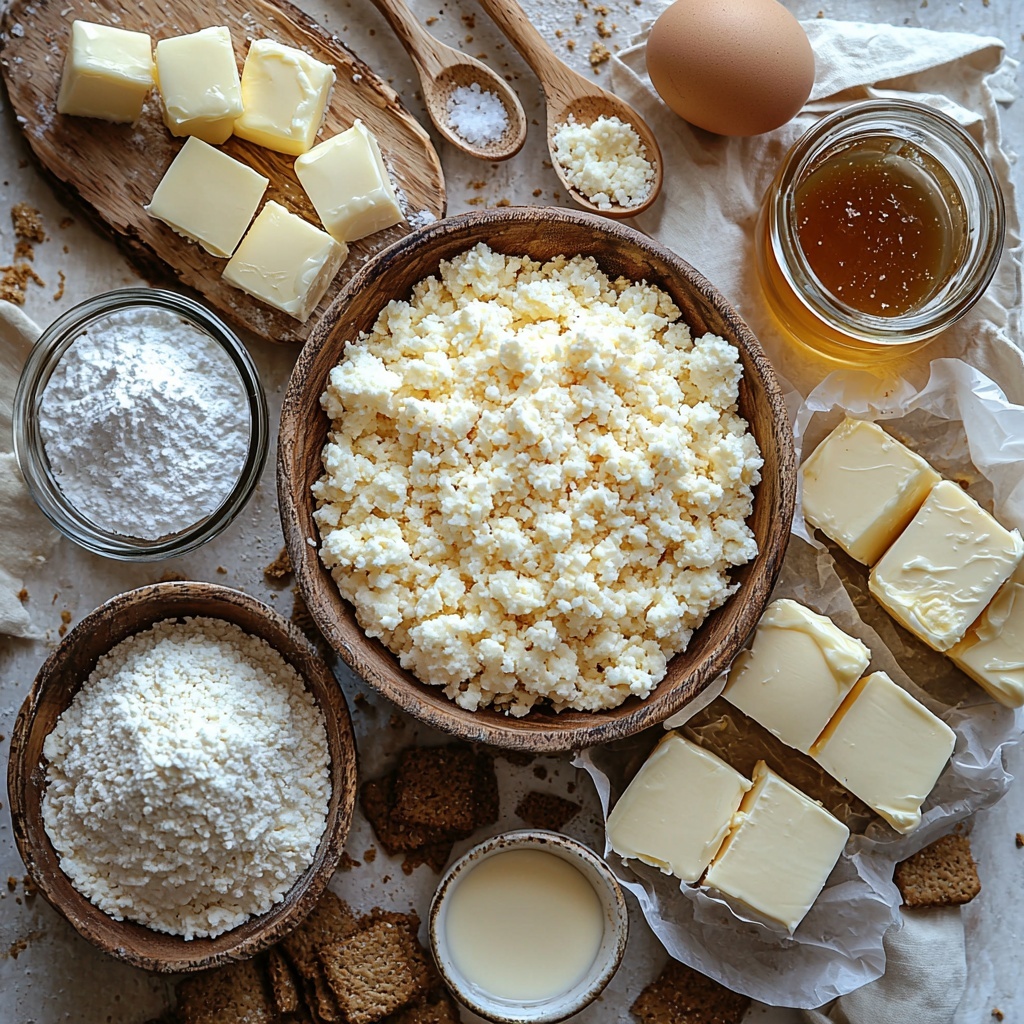
Gathering the ingredients for this cheesecake is simpler than you might think, but each one plays a crucial role in crafting that perfect harmony of taste and texture. From the crunchy yet tender crust to the creamy filling and finally the glossy salted caramel topping, these basics come together beautifully.
- Graham cracker crumbs: Provides the ideal crunchy and buttery base that sticks together perfectly for the crust.
- Unsalted butter: Melts into the crumbs helping bind the crust while adding richness without overpowering other flavors.
- Granulated sugar: Sweetens both the crust and filling evenly, balancing richness with just the right sweetness.
- Cream cheese: The star of the filling, softened to create a silky, smooth texture that’s irresistibly creamy.
- Large eggs: These give the cheesecake its custardy structure without making it heavy.
- Vanilla extract: Adds a subtle, warm aroma that complements the caramel beautifully.
- Sour cream: Gives the cheesecake a slight tang and a softer, less dense texture.
- Salt: A small pinch in the filling enhances the flavors, and when added to the caramel, it delivers that signature salted caramel flavor punch.
- Heavy cream: Makes the caramel sauce silky smooth and rich.
- Sea salt: Sprinkled in the caramel, it provides that perfect contrast that makes salty-sweet lovers swoon.
How to Make Salted Caramel Cheesecake: An Incredible Ultimate Recipe
Step 1: Prepare the Crust
Start by mixing your graham cracker crumbs, melted unsalted butter, and sugar until well combined. Press this mixture evenly into the bottom of a springform pan. This crust forms the crunchy foundation that will support the luscious cheesecake filling and adds a lovely texture contrast that everyone will adore.
Step 2: Make the Cheesecake Filling
In a large bowl, beat the softened cream cheese until perfectly smooth and creamy. Gradually add sugar, then add eggs one at a time, making sure each is fully incorporated before the next. This step is key for a dense, creamy texture without lumps. Mix in vanilla extract, sour cream, and a pinch of salt to deepen the flavor and create a beautifully balanced filling. Taking the time to scrape down the bowl edges keeps everything smooth and uniform.
Step 3: Assemble and Bake
Pour your creamy filling over the cooled crust in the pan. Bake at 325°F (163°C) for 50 to 60 minutes. You’re aiming for set edges with a slight jiggle in the center—this ensures a soft and silky middle that will firm perfectly as it cools. Once done, turn off the oven and leave the cheesecake inside with the door slightly open for about an hour. This gentler cooling prevents cracks and preserves that gorgeous surface.
Step 4: Chill the Cheesecake
After the initial cooling, place the cheesecake in the refrigerator for at least four hours or even overnight. This chilling period lets the flavors marry and the texture set to that dream-worthy firmness without losing a hint of creaminess.
Step 5: Make the Salted Caramel Sauce
In a medium saucepan, gently melt sugar over medium heat, stirring constantly until it turns a deep amber color—this transformation is where magic begins. Add butter pieces carefully, stirring until smooth, then slowly whisk in heavy cream. The bubbling at this point is a sign your sauce is coming together perfectly. End by stirring in sea salt to highlight that signature salty caramel balance. Let it cool slightly before using.
Step 6: Top the Cheesecake
Pour your cooled salted caramel sauce generously over the chilled cheesecake. You’re welcome to drizzle extra sauce on top for an even more indulgent look and flavor. The contrast of the golden caramel against the pale cheesecake is truly irresistible.
Step 7: Serve and Enjoy
Before slicing, carefully run a knife around the edges of the springform pan. This prevents sticking and ensures perfect slices. Cut your cheesecake while chilled and serve immediately for a dessert experience that’s rich, creamy, and decadently sweet with just the right salty kick.
How to Serve Salted Caramel Cheesecake: An Incredible Ultimate Recipe
Garnishes
Though this cheesecake shines on its own, you can elevate it with simple, elegant garnishes. Consider a sprinkle of flaky sea salt on top for a pretty finish and an extra salty hit. Chopped toasted pecans or walnuts add a lovely crunch and a nutty twist. Fresh berries can provide a tart contrast to the richness, and a dollop of whipped cream offers classic creaminess.
Side Dishes
Serve your Salted Caramel Cheesecake alongside a fresh fruit salad or a light sorbet to balance the richness. A cup of strong coffee or a creamy latte complements the sweet and salty flavors wonderfully. For a more festive occasion, a small glass of dessert wine like a late harvest Riesling pairs beautifully with the caramel notes.
Creative Ways to Present
Think outside the box by serving your cheesecake in individual mini jars topped with salted caramel and a sprinkle of nuts for an adorable presentation. Alternatively, create a layered parfait with cheesecake chunks, caramel sauce, and whipped cream in clear glasses for a striking visual and delightful taste experience. Garnishing with edible gold leaf can add a touch of indulgence perfect for special celebrations.
Make Ahead and Storage
Storing Leftovers
Leftover Salted Caramel Cheesecake should be tightly wrapped or stored in an airtight container in the refrigerator to maintain its creamy texture and prevent it from absorbing other odors. It will stay fresh and fabulous for up to 4 days, perfect for savoring every last bite.
Freezing
This cheesecake freezes beautifully if you want to prepare it well ahead of time. Wrap it tightly in plastic wrap and then aluminum foil to avoid freezer burn. It can be kept frozen for up to 2 months. Thaw overnight in the fridge before serving, and add fresh caramel sauce on top after thawing to keep that perfect texture and flavor.
Reheating
Salted Caramel Cheesecake is best enjoyed chilled and typically does not require reheating. If you prefer a slightly softer texture, let slices sit at room temperature for 15-20 minutes before serving. Avoid microwaving as it can affect the creamy texture and cause caramel sauce to become overly runny.
FAQs
Can I make this recipe without a springform pan?
A springform pan is highly recommended as it makes removing the cheesecake easier without damaging its structure. However, you can use a regular cake pan lined with parchment paper, but be extra careful when removing the cheesecake and consider loosening the edges with a knife first.
Is it possible to use store-bought caramel sauce instead of making homemade?
Yes, you can substitute with high-quality store-bought salted caramel sauce to save time. Homemade caramel, however, offers a richer, fresher flavor with control over saltiness and sweetness that enhances the overall cheesecake experience.
Why does my cheesecake crack on top?
Cracking typically happens due to overbaking or rapid temperature changes. To prevent this, bake until just set with a slight jiggle in the center and cool the cheesecake slowly with the oven door slightly open. Proper chilling also helps the cheesecake settle perfectly without cracks.
Can I use low-fat cream cheese or sour cream?
For best results, full-fat cream cheese and sour cream are recommended. Low-fat versions can change the texture and may result in a less creamy cheesecake. The fat content contributes to that luscious mouthfeel everyone loves.
How much salted caramel sauce should I pour on top?
It depends on how saucy you like your cheesecake, but start with about 1 cup of sauce to cover the top evenly. You can always offer extra on the side or drizzle more just before serving to keep the sauce fresh and vibrant.
Final Thoughts
Making the Salted Caramel Cheesecake: An Incredible Ultimate Recipe is truly a rewarding experience that brightens any occasion with its delicious layers and irresistible flavors. Whether you’re a cheesecake aficionado or trying it for the first time, this recipe’s balance of creamy filling and luscious salted caramel will quickly make it a treasured favorite. So roll up your sleeves, enjoy the process, and get ready to wow your friends and family with this unforgettable dessert delight!
Print
Salted Caramel Cheesecake: An Incredible Ultimate Recipe
- Prep Time: 30 minutes
- Cook Time: 1 hour 10 minutes
- Total Time: 5 hours 40 minutes
- Yield: 12 servings
- Category: Dessert
- Method: Baking
- Cuisine: American
Description
This Salted Caramel Cheesecake recipe features a creamy, smooth cheesecake nestled on a buttery graham cracker crust, topped with a luscious homemade salted caramel sauce. Perfectly balanced with sweet and salty flavors, it’s an indulgent dessert ideal for any special occasion.
Ingredients
For the Crust:
- 1 ½ cups graham cracker crumbs
- ½ cup unsalted butter, melted
- ¼ cup granulated sugar
For the Cheesecake Filling:
- 4 (8-ounce) packages cream cheese, softened
- 1 cup granulated sugar
- 4 large eggs
- 1 teaspoon vanilla extract
- ½ cup sour cream
- ¼ teaspoon salt
For the Salted Caramel Sauce:
- 1 cup granulated sugar
- 6 tablespoons unsalted butter, cut into pieces
- ½ cup heavy cream
- 1 teaspoon sea salt (or to taste)
Instructions
- Prepare the Crust: Preheat your oven to 350°F (175°C). In a mixing bowl, combine the graham cracker crumbs, melted unsalted butter, and granulated sugar. Mix thoroughly until the crumbs are evenly moistened. Press this mixture firmly into the bottom of a springform pan to create an even crust. Bake the crust for about 10 minutes, then remove and let it cool completely.
- Make the Cheesecake Filling: In a large mixing bowl, beat the softened cream cheese until smooth and creamy using an electric mixer. Gradually add the granulated sugar, continuing to beat until the mixture is thick and creamy. Add the eggs one at a time, mixing well after each addition to ensure a smooth texture. Scrape the sides of the bowl as needed to incorporate all ingredients evenly. Stir in the vanilla extract, sour cream, and salt until well combined and silky smooth.
- Assemble and Bake the Cheesecake: Pour the cheesecake filling over the cooled crust in the springform pan, smoothing the top evenly. Bake in the preheated oven for 50-60 minutes, or until the edges are set and the center remains slightly jiggly when gently shaken. After baking, turn off the oven and crack the oven door open, allowing the cheesecake to cool gradually inside the oven for about one hour to prevent cracking.
- Chill the Cheesecake: Once cooled to room temperature in the oven, transfer the cheesecake to the refrigerator. Chill the cheesecake for at least 4 hours, preferably overnight, to allow it to fully set and develop its creamy texture.
- Prepare the Salted Caramel Sauce: In a medium saucepan over medium heat, melt the granulated sugar by stirring constantly until it reaches a deep amber caramel color. Carefully add the cut pieces of unsalted butter, stirring continuously until melted and incorporated. Slowly pour in the heavy cream while stirring; the mixture will bubble vigorously, so be cautious. Remove from heat and stir in the sea salt to taste. Allow the caramel sauce to cool slightly before using.
- Top the Cheesecake: Once the cheesecake is thoroughly chilled, pour the salted caramel sauce evenly over the top surface. Optionally, drizzle extra caramel sauce for a decorative finish.
- Serve: Run a knife gently around the edges of the springform pan to loosen the cheesecake before releasing the sides. Slice the cheesecake into portions and serve chilled for the best flavor and texture experience.
Notes
- Be sure to use full-fat cream cheese for the best texture and flavor.
- To prevent cracks, avoid overbaking the cheesecake; the center should remain slightly jiggly when done.
- Letting the cheesecake cool gradually in the oven helps minimize cracks.
- Use a water bath if desired to ensure even baking and reduce cracking.
- The salted caramel sauce can be stored in the refrigerator for up to one week and gently reheated before serving.
- For easier slicing, dip the knife in hot water and wipe it clean between cuts.